
If you are using JasperServer community edition, you are probably wondering how to run reports from within other applications. More specifically, you may be wondering how to create dashboards. JasperServer offers two ways to do this: web services and HTTP requests with URL parameters. Web services, for the most part, require programming and compiling for a specific platform. That may not be an option for most business users, who may be making reports but may have no interest in writing computer programs. However, with just a few changes on the server, business users can easily integrate reports into their own business applications, such as Excel, SharePoint, OpenOffice, etc. -- without doing any programming. In this article, I explain how to create a simple dashboard using SharePoint Web Parts (widgets), JasperServer, and the HTTP method for calling specific reports.
Although this example uses SharePoint, the HTTP method is be the same for creating dashboards in web pages or custom applications. For a dashboard, the easiest way to get started is to create a report with nothing but a graph using iReport. The graph pulls data from a given data source. Here, it pulls change order information from CA's Unicenter ServiceDesk. Then in SharePoint, a web capture web part opens the report inside of a frame. The web part looks like this:
\
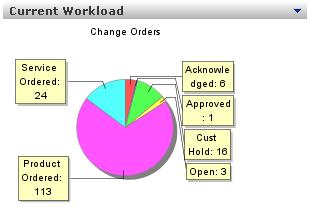
Finished Web Part
\
The first step is to create a report that displays a chart (or a summary field or table). This can be done in iReport. The trick is to avoid scroll bars around the report, which can be done by setting the height and width of the report's page just 4 pixels larger than the report's content. This allows 2 pixels of empty space around the contents.
\
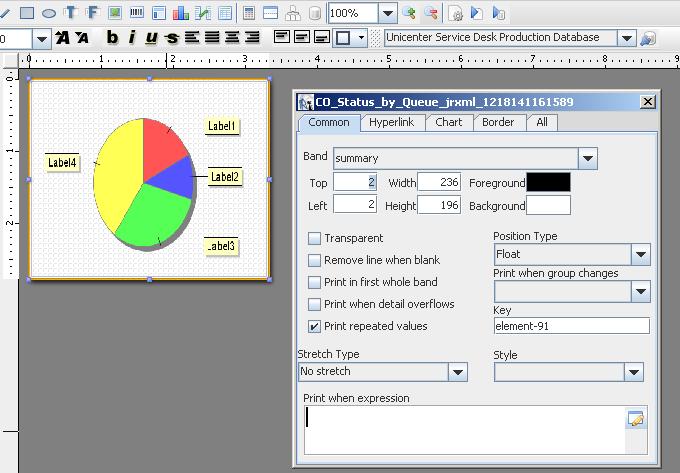
Jasper Reports Dashboard in SharePoint Site: iReport Image Properties
\
Next, save the report to JasperServer under a directory called "Widgets." Create a new account for anonymous access (if you do not have one yet), and grant it read-only access to the Widgets directory.
In your SharePoint page, add a Web Capture web part. The URL would look like this:
http://: /jasperserver/flow.html?_flowId=viewReportFlow&reportUnit=/reports/Widgets/ServiceDesk_WorkOrders&j**_username=**&j_password= &decorate=no&output=html*<¶meter1=value1¶meter2=value2...>*
The "decorate=no" option removes the page header, and "output=html" generates an HTML report. If you would like, you could also use pdf, swf, xls or csv as the output. The parameters are for input controls, if you have any. The "reportUnit" parameter obviously needs to be followed by the path to your report. Now comes the tricky part. Calling a report in this manner would cause JasperServer to display a table with report options (back, export to PDF, export to XLS, etc.). This would be undesirable for a widget or dashboard section. The only way to change this behavior is to either use a web service to retrieve data and write code to display it, or tweak DefaultJasperViewer.jsp. Since it is so much easier to stick to the HTTP (URL) method, opt for the second option. Change DefaultJasperViewer.jsp as follows:
Just before the code used to display the report, add the following line (there are multiple places for this). See the comments section for a sample file containing all these changes.
<%if (!"true".equals(request.getParameter("enableDashboardView")) && !"yes".equals(request.getParameter("enableDashboardView"))) {%>
<%
exporter.setParameter(JRExporterParameter.OUTPUT_WRITER, out);
exporter.exportReport();
%>
<%} else {%>
Then after the report code, close the above if-else statement with a closing curly brace:
<% } %>
This will enable a new parameter in the URL: enableDashboardView. When set to true, it will suppress the report options toolbar. The report URL will now look like this:
http://: /jasperserver/flow.html?_flowId=viewReportFlow&reportUnit=/reports/Widgets/ServiceDesk_WorkOrders&j_username=&j_password= &decorate=no&output=html&enableDashboardView=true<¶meter1=value1¶meter2=value2...>
Back in SharePoint, enter this URL, complete with your report name (/reports/Widgets/ServiceDesk_WorkOrders in this example), into the web capture web part.
\
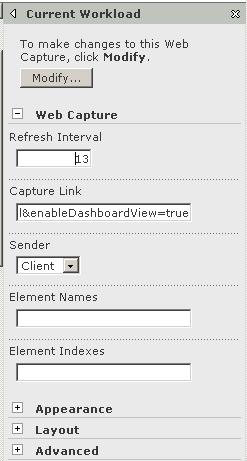
Web Part Properties
\
Save the web capture web part, refresh the page, and sit back admire this JasperServer-based dashboard!
\
Finished Web Part
\